

008615063091883
 English
-
 English
 -
عربي
-
Deutsch
-
Русский язык
-
Français
-
Latina
-
Português
-
Español


info@kingstar-glass.com
Customizing Tempered Glass: Edge Polishing, Cutouts, and Holes for Facade Engineering
Author:Qingdao Kingstar Glass Co., Ltd
Click:
Time:2026-09-16 10:22:55
Here's a truth we've learned after years of shipping tempered glass to facade contractors around the world: the glass itself is rarely the problem. The problem is almost always in the details—the edge finish that wasn't specified correctly, the hole that was placed too close to the edge, the cutout that was forgotten until after tempering. That's why customization isn't a value-added service. It's the difference between a project that sails through inspection and one that stalls on site.
If you're new to tempered glass sourcing, our main guide, The Complete B2B Guide to Architectural Tempered Glass: Safety, Standards, and Sourcing, covers the fundamentals. This article zooms in on the fabrication side—what happens before the glass goes into the furnace, and why those details matter more than most contractors realise.
The One Rule You Can't Break: All Fabrication Happens Before Tempering
We've said this before, and we'll keep saying it until it stops being a problem: tempered glass cannot be cut, drilled, or modified after it leaves the furnace. The internal stresses that give tempered glass its strength also make it impossible to work with once the process is complete. Any attempt to drill a hole or trim an edge will shatter the entire pane.
This means every hole, every notch, every cutout, every edge treatment must be specified and completed before the glass enters the tempering furnace. There's no going back. No 'we'll fix it on site.' No second chances.
We've seen the consequences of forgetting this rule. A facade contractor in Dubai once sent us drawings for a curtain wall project with 47 custom glass panels. The drawings looked fine—until we noticed that one panel had a hole pattern that would sit just 12mm from the edge. For 12mm glass, that's a problem. The minimum edge distance for a hole is typically twice the glass thickness—24mm in this case. We flagged it, the contractor revised the drawings, and we avoided a disaster. But if we hadn't caught it, that entire panel would have been scrap after tempering.
Edge Polishing: More Than Just Aesthetics
Edge work is one of those things that doesn't get enough attention until something goes wrong. And when it goes wrong, it usually goes wrong in a way that's expensive to fix.
The edges of tempered glass are the most vulnerable part of the pane. Micro-cracks from cutting or grinding can become stress concentration points. If the edge isn't finished properly, those micro-cracks can grow under load, leading to breakage—sometimes months after installation.
There are several edge types commonly used in facade engineering, each with its own characteristics:
| Edge Type | Description | Typical Application |
|---|---|---|
| Straight Cut | Rough, unfinished edge from cutting. Visible grinding marks. | Not recommended for exposed edges. Used when edge is covered by frame. |
| Fine Ground | CNC-machined edge with smooth, matte finish. Removes micro-cracks. | Most architectural applications. Standard for tempered glass. |
| Polished | Smooth, glossy edge. Multi-stage polishing with progressively finer abrasives. | Exposed edges, high-end facades, glass balustrades. |
| C-Edge | Rounded edge profile, typically 1–2mm radius. | Safety-critical applications where sharp edges are a concern. |
| Pencil Edge | Small rounded edge, similar to C-edge but with a smaller radius. | Common in interior glass, shower enclosures, furniture. |
| Flat Edge | Flat, squared edge with slight chamfer. | Structural glazing, where edge is visible but not polished. |
| Beveled Edge | Angled edge, typically 45°. | Decorative applications, glass doors, mirrors. |
The choice of edge type affects not just the look but also the strength. A polished edge removes more material than a fine-ground edge, which can slightly reduce the glass's load-bearing capacity—but it also removes micro-cracks more effectively, reducing the risk of spontaneous breakage. For most facade applications, fine grinding is the minimum acceptable finish. For exposed edges, polishing is the standard.
European standards like EN 12150 specify edge work requirements for thermally toughened glass. The standard requires that edges be free from defects that could cause breakage, and that any grinding or polishing be done before tempering. ASTM C1048 similarly requires that all fabrication, including edge work, be completed before strengthening.
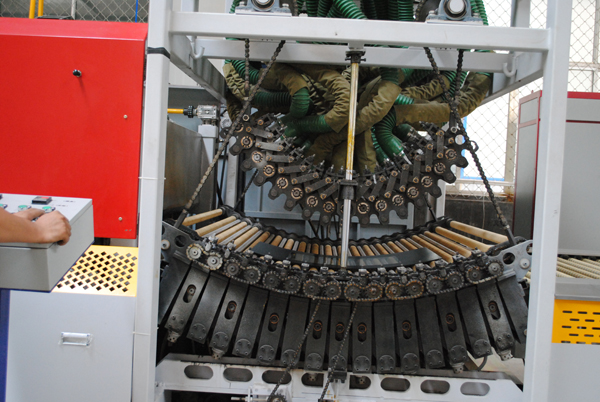
We run CNC edge polishing lines that can handle C-edges, pencil edges, flat edges, and custom profiles. The tolerances we hold are tight—typically ±0.5mm on edge dimensions, depending on the profile. For facade work, where glass panels are often large and visible, those tolerances matter.
Holes and Cutouts: The Engineering Details That Make or Break a Facade
Holes and cutouts are where facade engineering gets interesting. They're also where most mistakes happen.
The rules for hole placement in tempered glass are not arbitrary. They're based on stress distribution. When you drill a hole in glass, you create a stress concentration point. If that hole is too close to the edge, or too close to another hole, the stress concentration can exceed the glass's strength—especially after tempering, when the internal stresses are locked in.
Here are the general guidelines we follow:
| Parameter | Minimum Requirement | Notes |
|---|---|---|
| Hole diameter | ≥ glass thickness | Smaller holes are difficult to drill cleanly. |
| Distance from hole edge to glass edge | ≥ 2× glass thickness | For 10mm glass, minimum 20mm. |
| Distance between hole edges | ≥ 2.5× hole diameter | For a 20mm hole, minimum 50mm between edges. |
| Cutout corner radius | ≥ 5mm if unfinished, ≥ 15mm if finished | Sharp corners are stress concentrators. |
| Hole tolerance | ±0.5mm typical | Depends on CNC equipment and glass thickness. |
These are general rules. Different standards and different glass thicknesses may require different minimums. For example, some European specifications require a minimum edge distance of 3× glass thickness for holes in load-bearing applications. Always check the project specification and confirm with your glass supplier.
We use CNC drilling machines and waterjet cutting for complex cutouts. Waterjet is particularly useful for intricate shapes or when the glass is already laminated—it cuts without introducing heat, which can cause micro-cracks. For standard holes, CNC drilling is faster and more cost-effective.
One thing we always tell contractors: provide us with CAD drawings, not sketches. We can work from sketches, but the risk of misinterpretation goes up. With CAD, we can import the file directly into our CNC programming software, verify dimensions, and flag any issues before production starts.
We also offer a pre-production sample service for complex jobs. If you're specifying a panel with multiple holes and cutouts, we can produce one sample panel, fabricate it, temper it, and ship it to you for approval before running the full batch. It adds a few days to the schedule, but it's saved more than one project from a costly mistake.
What We've Learned From Facade Projects
We had a client last year—a facade contractor working on a mixed-use tower in Singapore. The design called for structural silicone glazing with custom cutouts for the brackets. The cutouts were complex—not just simple holes, but irregular shapes with tight tolerances.
The contractor sent us their drawings. We reviewed them, flagged a few dimensions that looked tight, and suggested some adjustments. They agreed. We produced a sample panel, tempered it, and shipped it to Singapore. The contractor installed it on a mock-up. It fit perfectly.
Then we ran the full batch—320 panels. Every one of them matched the sample. Every one of them passed inspection on site. The project was completed on schedule.
That's the outcome we aim for. But it doesn't happen by accident. It happens because we take the time to review drawings, ask questions, and verify before production.
We've also seen the opposite. A contractor in Australia once ordered tempered glass with holes for a balustrade system. They provided drawings, we fabricated, we shipped. The glass arrived. It didn't fit. The holes were in the wrong position—not because we made a mistake, but because the contractor's drawings had been revised after they sent them to us, and they forgot to send the updated version. We had to remake the entire order. The contractor ate the cost, and the project was delayed by three weeks.
The lesson? Communication is everything. Send final drawings. Confirm revisions. Don't assume your supplier knows about changes unless you tell them.

How to Specify Custom Tempered Glass Without Losing Your Mind
Here's a checklist we give to every contractor who orders custom tempered glass from us:
- Provide CAD drawings – DWG, DXF, or PDF. Include all dimensions, hole positions, and cutout profiles.
- Specify edge type – Fine ground, polished, C-edge, pencil edge, or custom. If you're not sure, ask us—we'll recommend based on your application.
- Specify hole tolerances – ±0.5mm is standard. Tighter tolerances are possible but may increase cost and lead time.
- Confirm the standard – ASTM C1048, EN 12150, AS/NZS 2208, or other. This affects everything from surface compression to edge work.
- Ask for shop drawings – We provide detailed fabrication drawings for approval before production. Review them carefully.
- Consider a sample panel – For complex jobs, a pre-production sample is cheap insurance.
- Don't change anything after tempering – Once the glass is tempered, it's final. No changes. No exceptions.
We've built our fabrication capability around these principles. Our CNC lines can handle glass up to 3,300mm × 6,000mm, with thicknesses from 4mm to 19mm. We can drill holes, cut notches, polish edges, and produce complex cutouts—all before tempering. And we do it with the tolerances that facade engineering demands.
Your Project Deserves a Partner Who Understands Fabrication
Every custom tempered glass project is a collaboration. You bring the design intent. We bring the manufacturing expertise. Together, we make sure the glass fits, performs, and lasts.
Whether you're working on a high-rise curtain wall, a bespoke storefront, or a structural glass fin, we've got the equipment and the experience to match your drawings. We've been manufacturing architectural tempered glass for projects across North America, Europe, Australia, and Asia—and we know what it takes to get your glass through customs, past inspection, and onto the jobsite without surprises.
Send us your specifications. We'll review them, flag any potential issues, and give you a quote that won't change after tempering. Let's build something that fits.
Frequently Asked Questions
Q: Can you drill holes in tempered glass after it's been tempered?
A: No—and this is one of the most common mistakes we see. Tempered glass cannot be cut, drilled, or modified after tempering. The internal stresses will cause the entire pane to shatter if you try. All fabrication—cutting, drilling, notching, edge grinding—must be completed before the glass enters the tempering furnace. This is why accurate, finalised specifications are critical for tempered glass projects. KINGSTAR BUILDING GLASS handles all fabrication in-house before tempering, so your glass arrives ready to install.
Q: What's the difference between a C-edge and a pencil edge?
A: Both are rounded edge profiles, but they differ in radius. A C-edge typically has a larger radius—usually 1–2mm—while a pencil edge has a smaller radius, often less than 1mm. C-edges are more common in safety-critical applications where sharp edges are a concern, such as glass balustrades or shower enclosures. Pencil edges are often used in interior glass, furniture, and decorative applications. The choice depends on the application and the aesthetic you're after. We can produce both profiles on our CNC lines.
Q: How close can a hole be to the edge of tempered glass?
A: The general rule is that the distance from the hole edge to the glass edge should be at least twice the glass thickness. For 10mm glass, that means a minimum of 20mm. For 12mm glass, 24mm. Some standards and project specifications require even greater distances—up to three times the glass thickness for load-bearing applications. Always check the project specification and confirm with your glass supplier. We review every drawing we receive and flag any holes that fall outside safe tolerances.

点击右上角
分享给朋友吧







 Long by picture save/share
0
文章推荐

Kingstar Building glass: www.kingstar-glass.com
Kinstar Glassware (Professional Glassware & Kitchen Storage): www.kingstarliving.com


Kingstar Building glass:
Email: eric@kingstar-glass.com
Kingstar Glassware
(Professional Glassware & Kitchen Storage):
Email: info@kingstar-glass.com
Address: NO.101 SHENZHEN ROAD, QINGDAO, CHINA
© 2022 Qingdao Kingstar Glass Co., Ltd . All rights reserved Site Map | Technical Support:weidongli
Building glass:
Wechat/Whatsapp: 008618562697682
Email: eric@kingstar-glass.com
Glassware please visit: www.kingstarliving.com
Wechat/Whatsapp: 008615063091883
Email: info@kingstar-glass.com
Address: NO.101 SHENZHEN ROAD, QINGDAO, CHINA

© 2022 Qingdao Kingstar Glass Co., Ltd . All rights reserved Site Map
